

To setup your WhatsApp Templates
- Navigate to your WhatsApp Bot.
- Click on WhatsApp Automation.
- Select Templates.
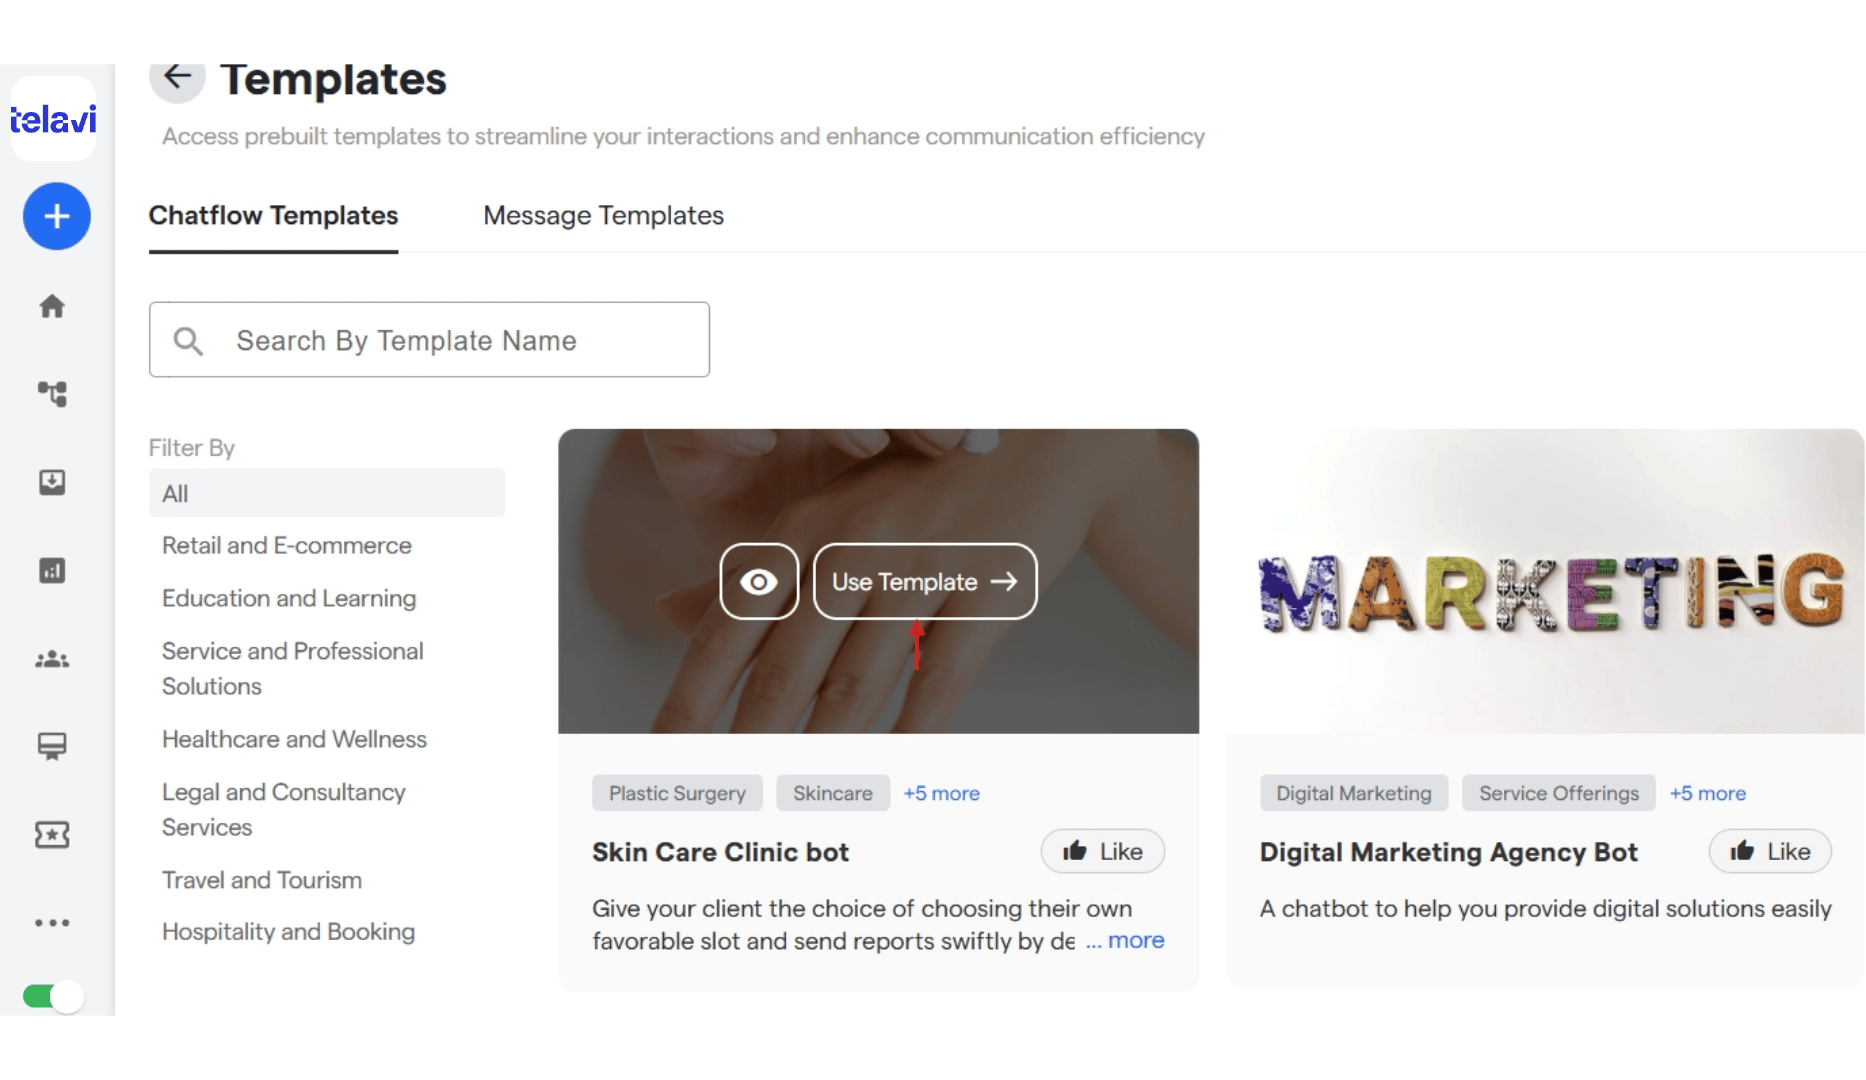
- You will get an option to select pre-defined Templates. You can either select from Chatflow Template or Message Templates.
CHATFLOW TEMPLATE
- When you hover your mouse on any template, you will get the option to preview or use the template.
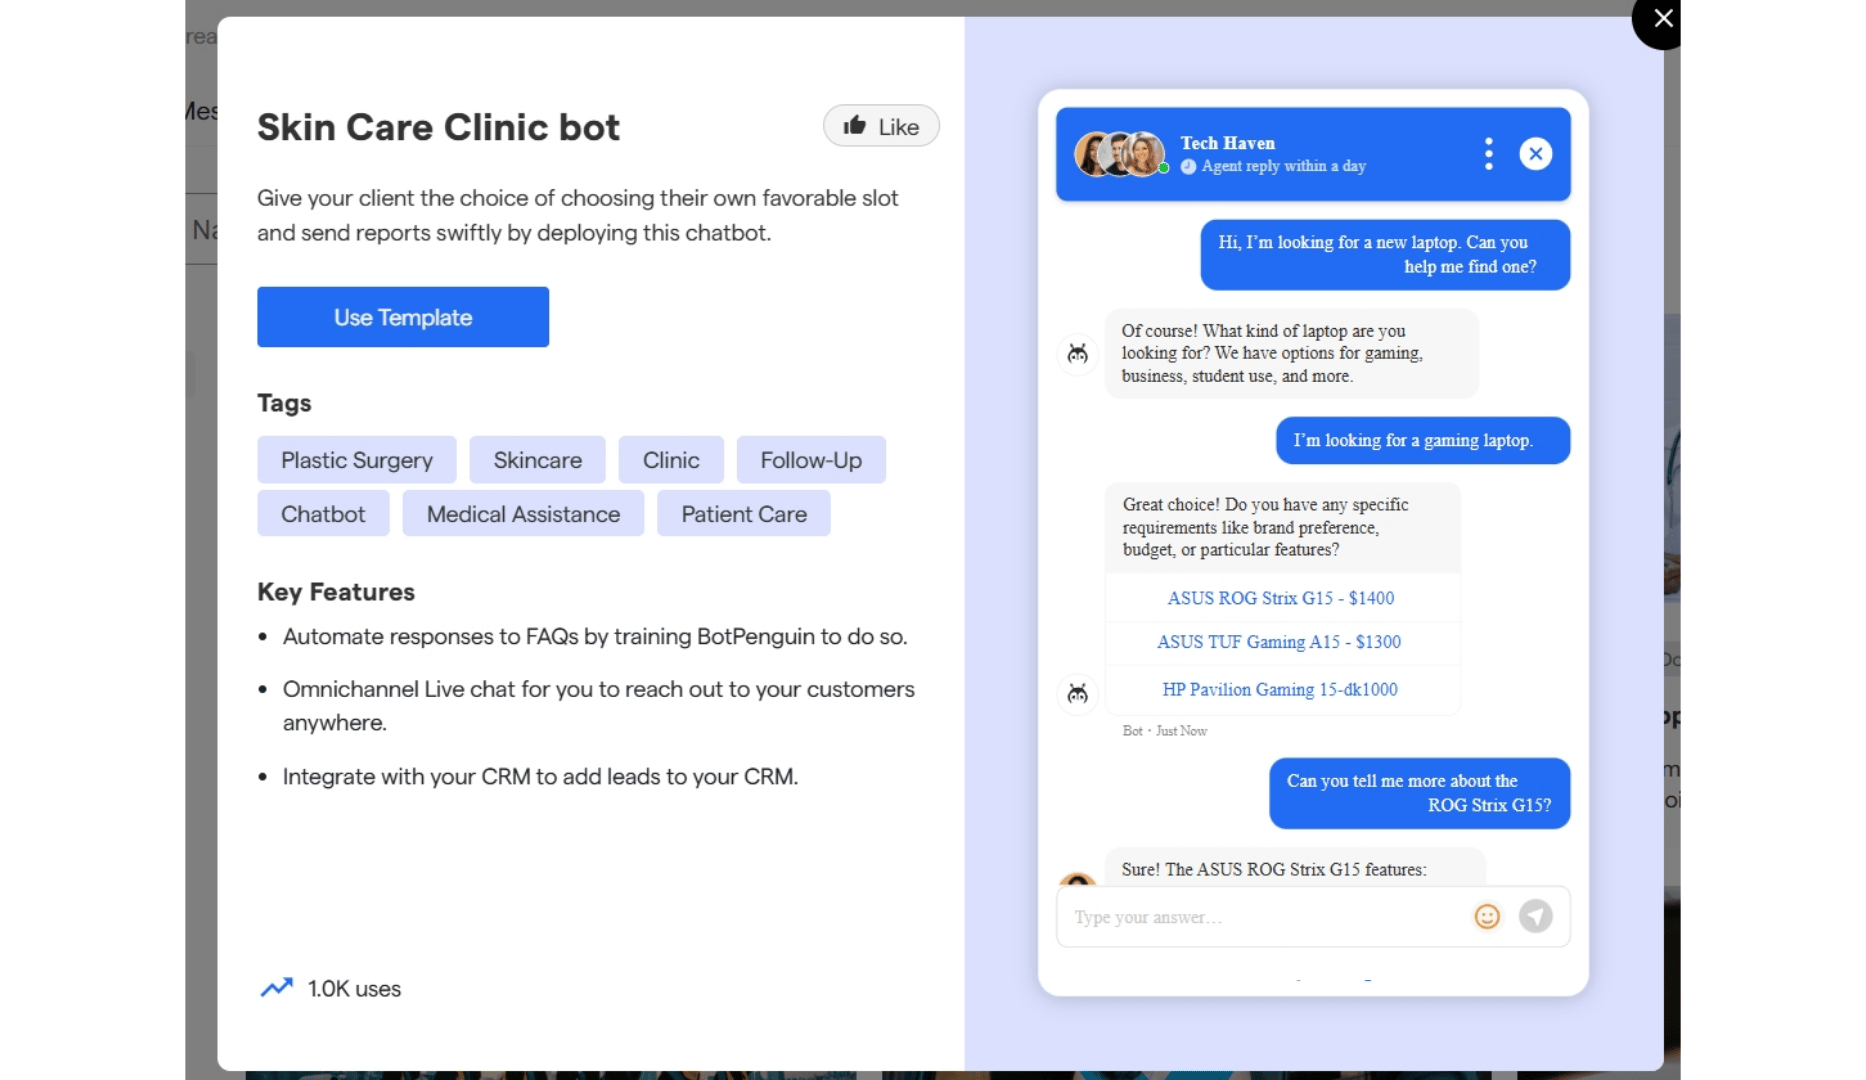
- While previewing, you can click on “Use Template” to directly use it in your chatflow.
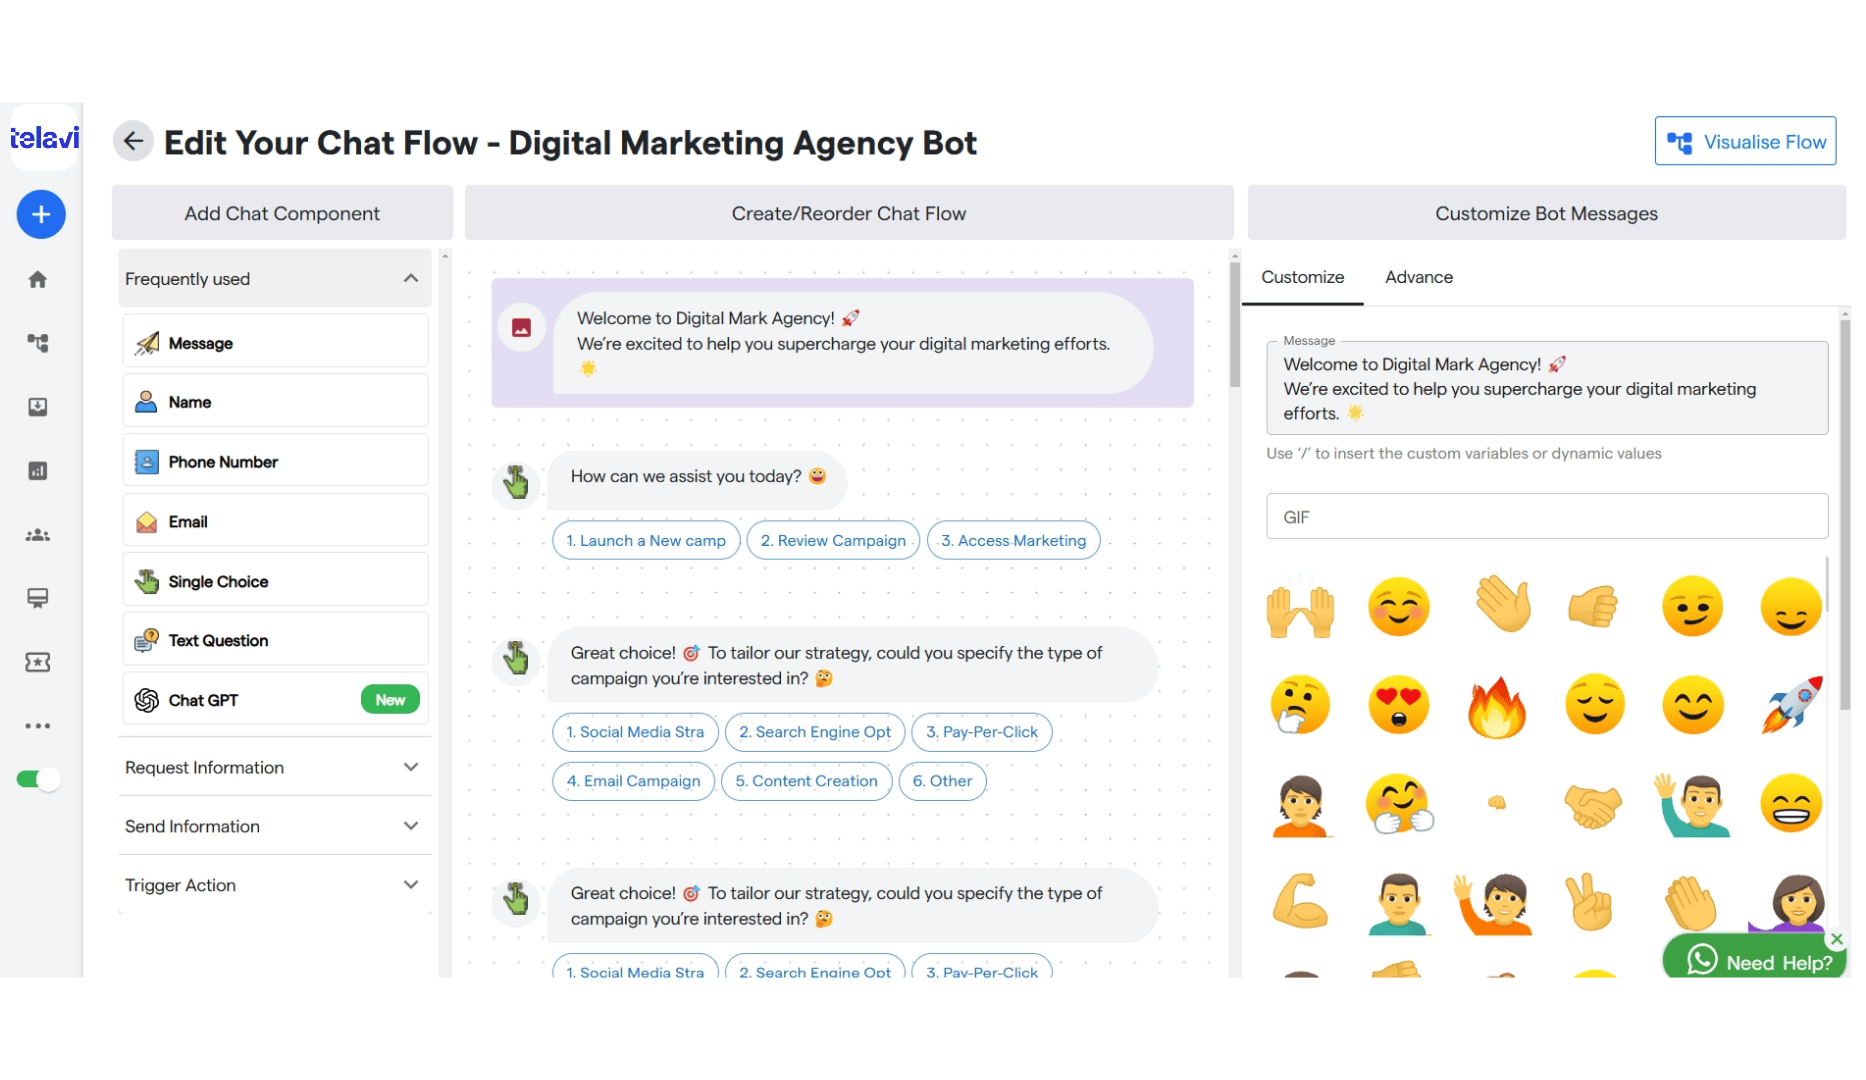
- Once you click “Use Template”, your chatflow template will be ready to use and edit inside “Edit Your Chat Flow”. You can customize it according to your requirements.
MESSAGE TEMPLATE
- Click on Message Templates to select a pre-defined template from the “Templates Gallery”, or create and customize your own template by selecting “Your Templates”.
- When you hover on any pre-defined template, you can either preview it first or directly click “Use Template”.
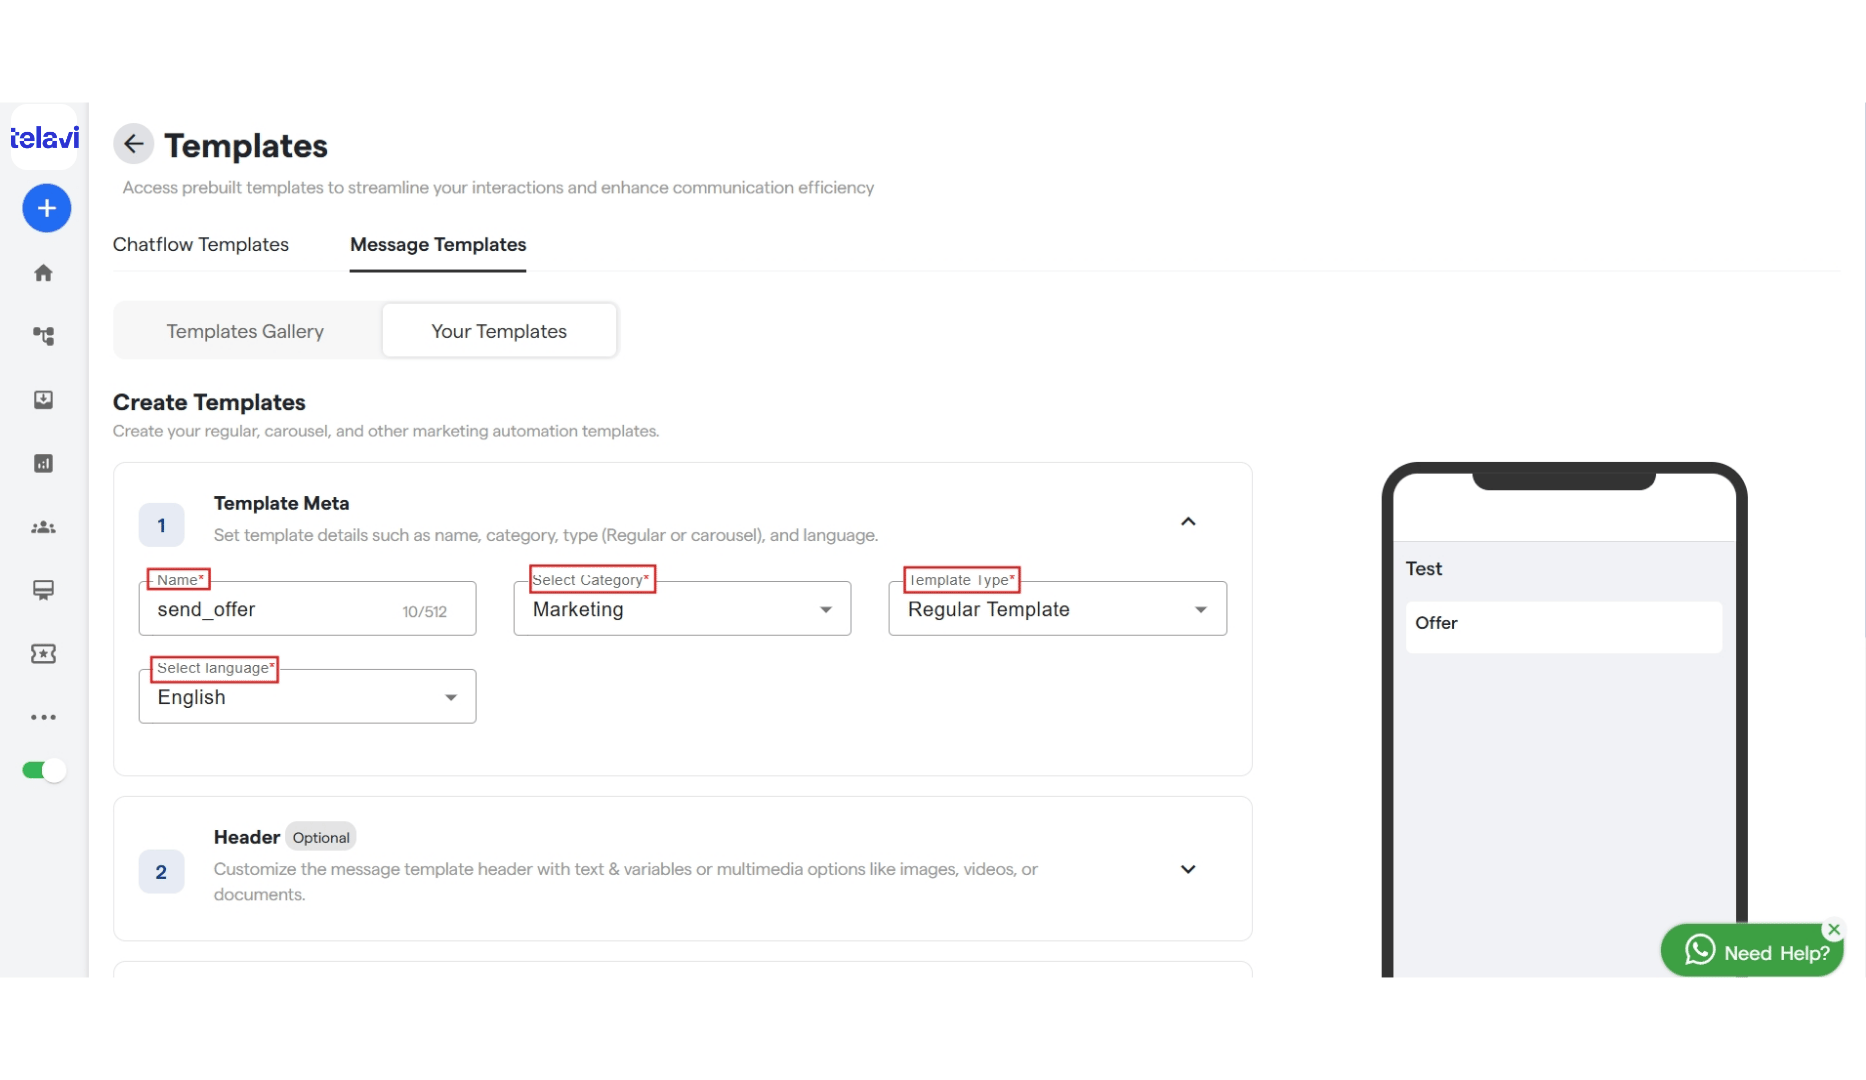
With Regular Template
- You can create a new template in the “Your Templates” section by selecting “Create Template”.
- Under Create Templates, enter a name/title and category for your template, and select a language. You can also select a type for your template from the dropdown.
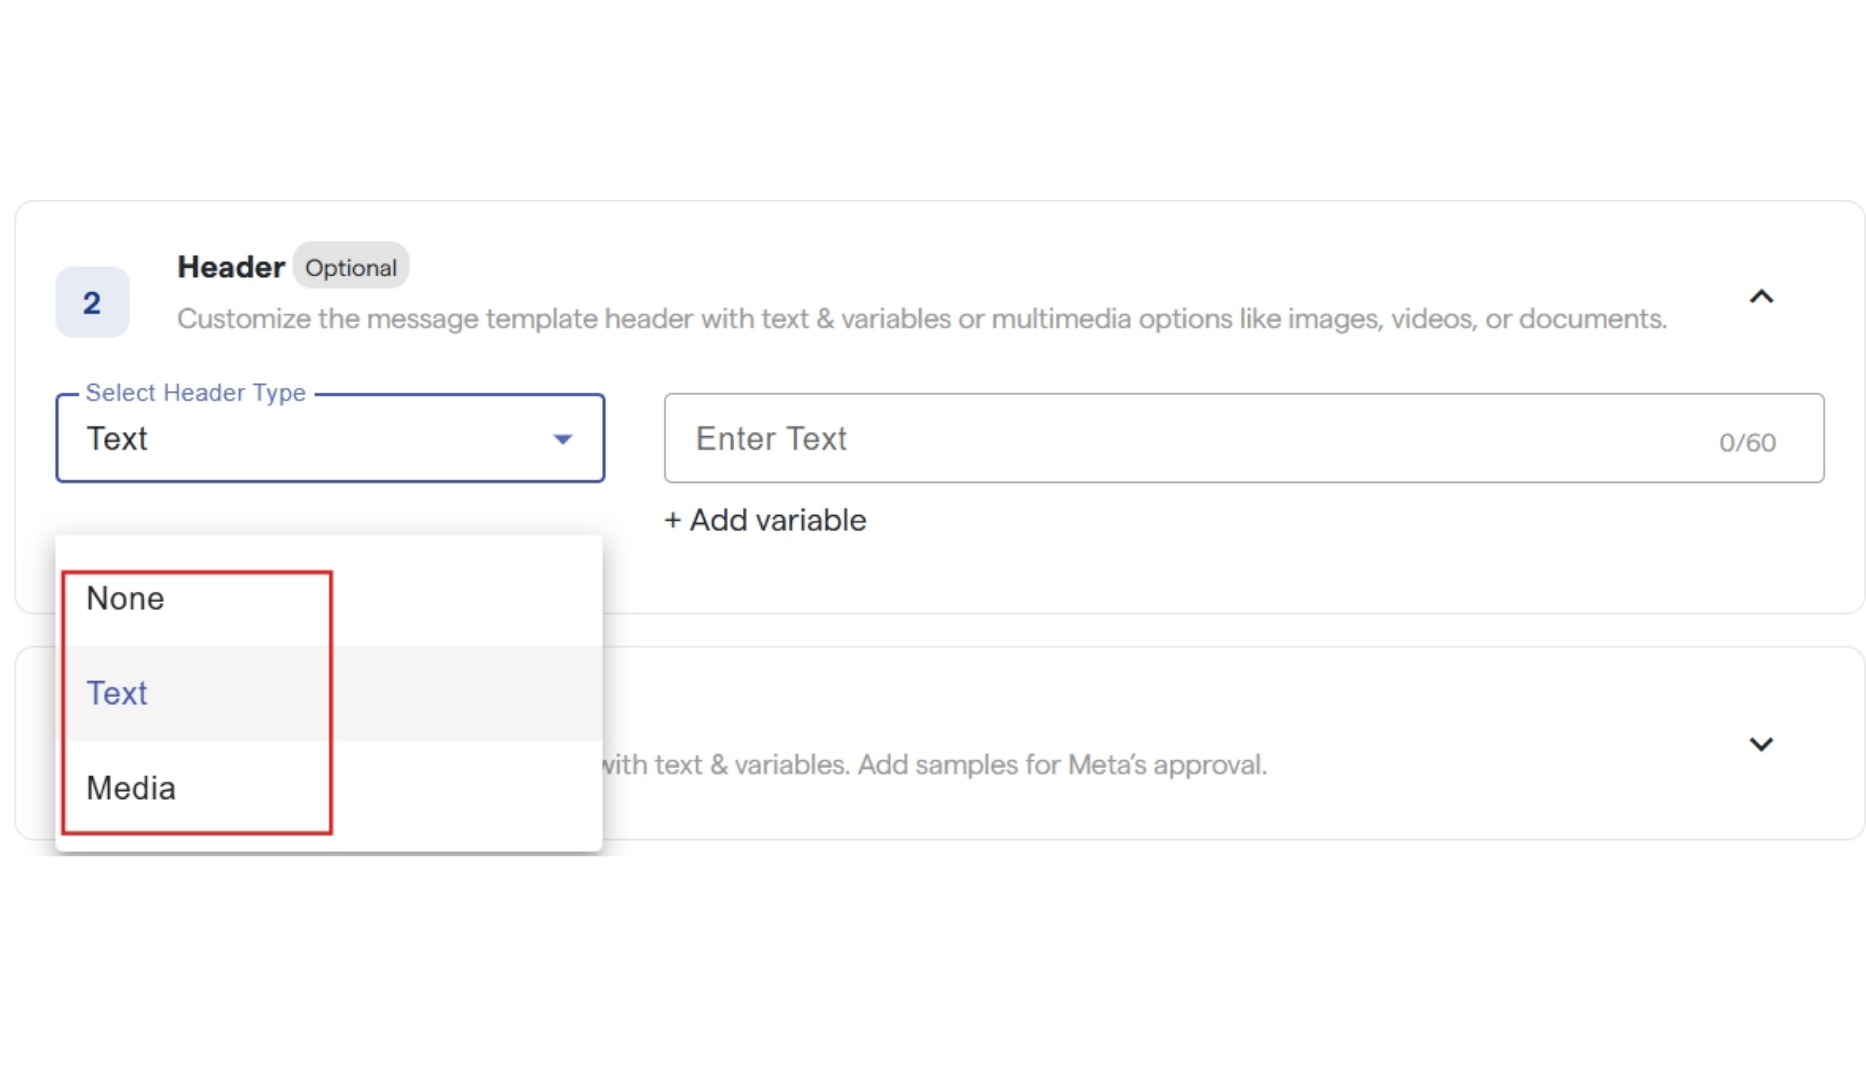
- To configure your template, select a format for the header from the dropdown and enter the header text you want to display to your customer. Alternatively, you can select a media file to share — it can be an image, video, or document.
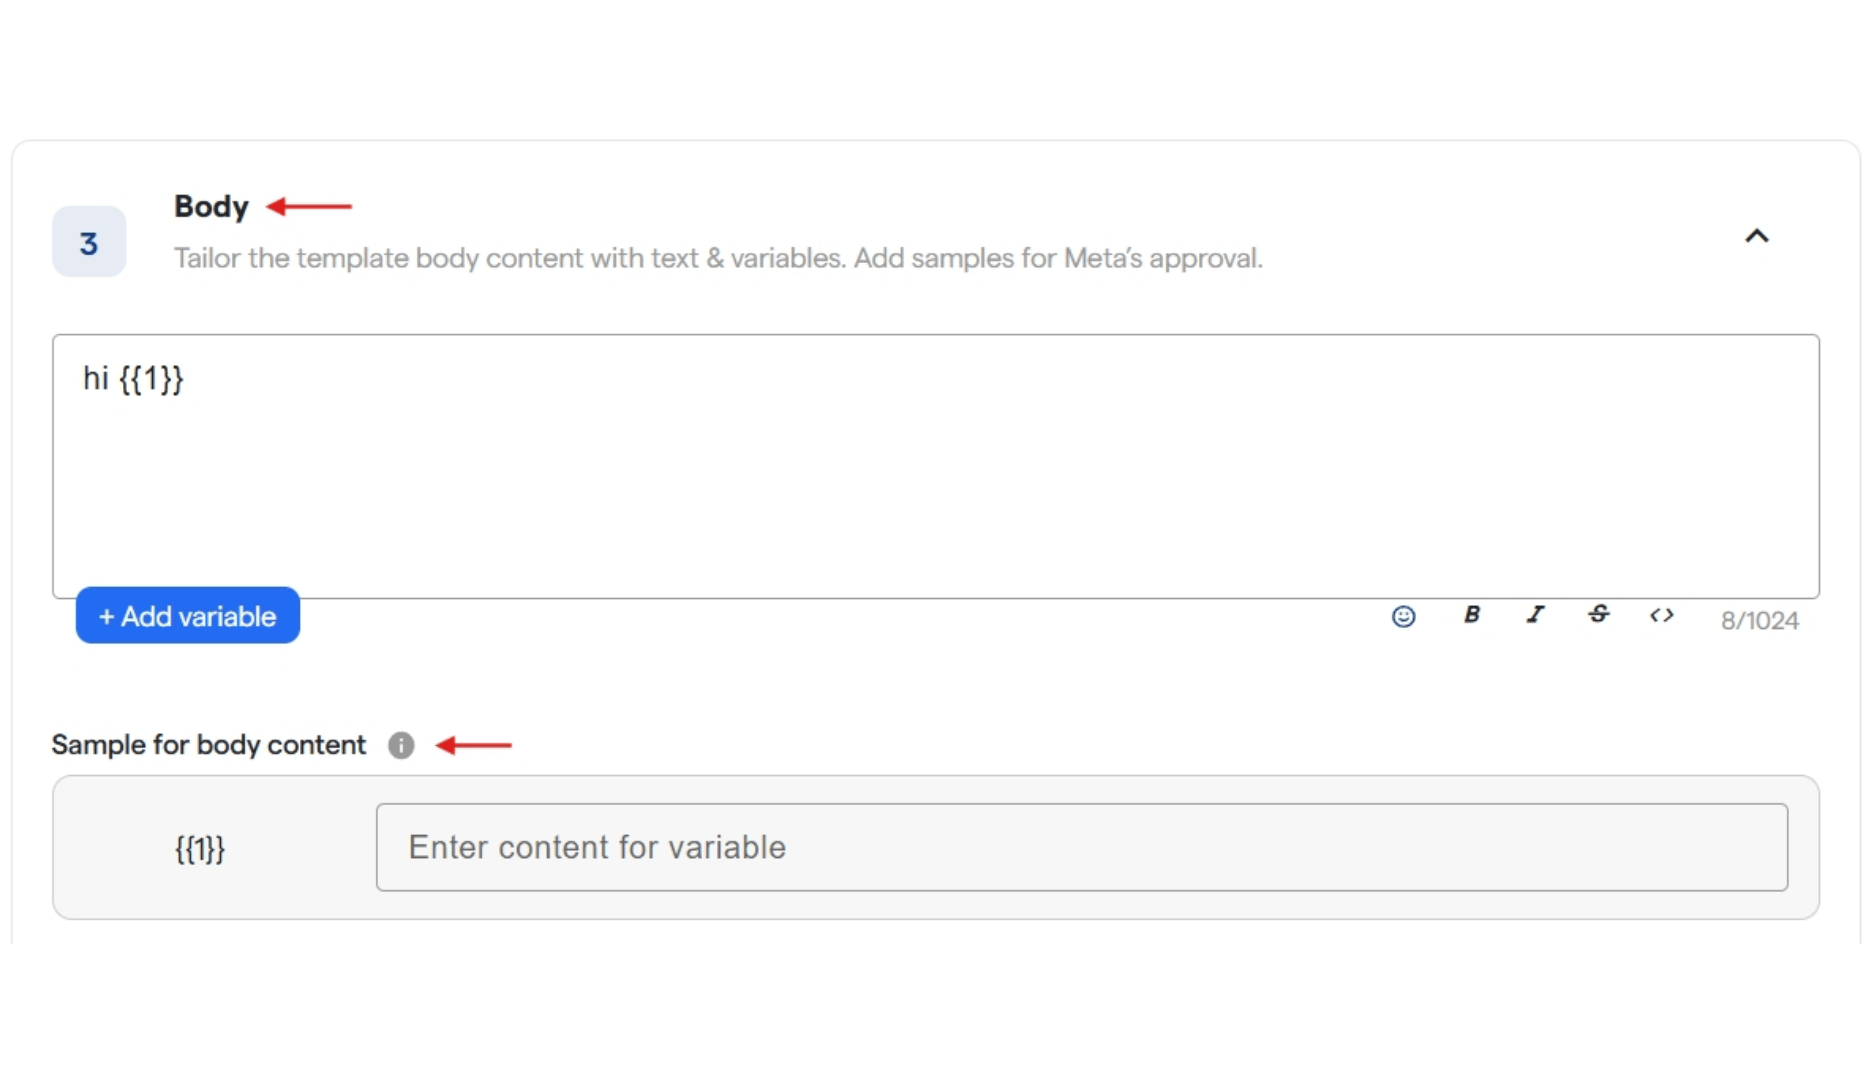
- Enter the content for your template inside the Body box. You can use variables in the body and configure them later.
- Enter the content for the Footer that will be displayed in your template.
- You can also add Buttons to your template. After selecting the button type from the dropdown, configure them as required.
- Click “Save as Draft” if you want to make changes later, or click “Submit for Approval” once you are done creating the template.
- In “Manage Templates”, your template will be visible. It will get approved by WhatsApp once submitted for approval.
- Under Actions, you have options to copy the template ID, delete the template, and select a flow for the buttons inside the template.
- Similarly, you can configure flows for your template replies using the buttons added to it.
With Carousel Template
- When you select “Carousel” as the Template Type, you will get the following options:
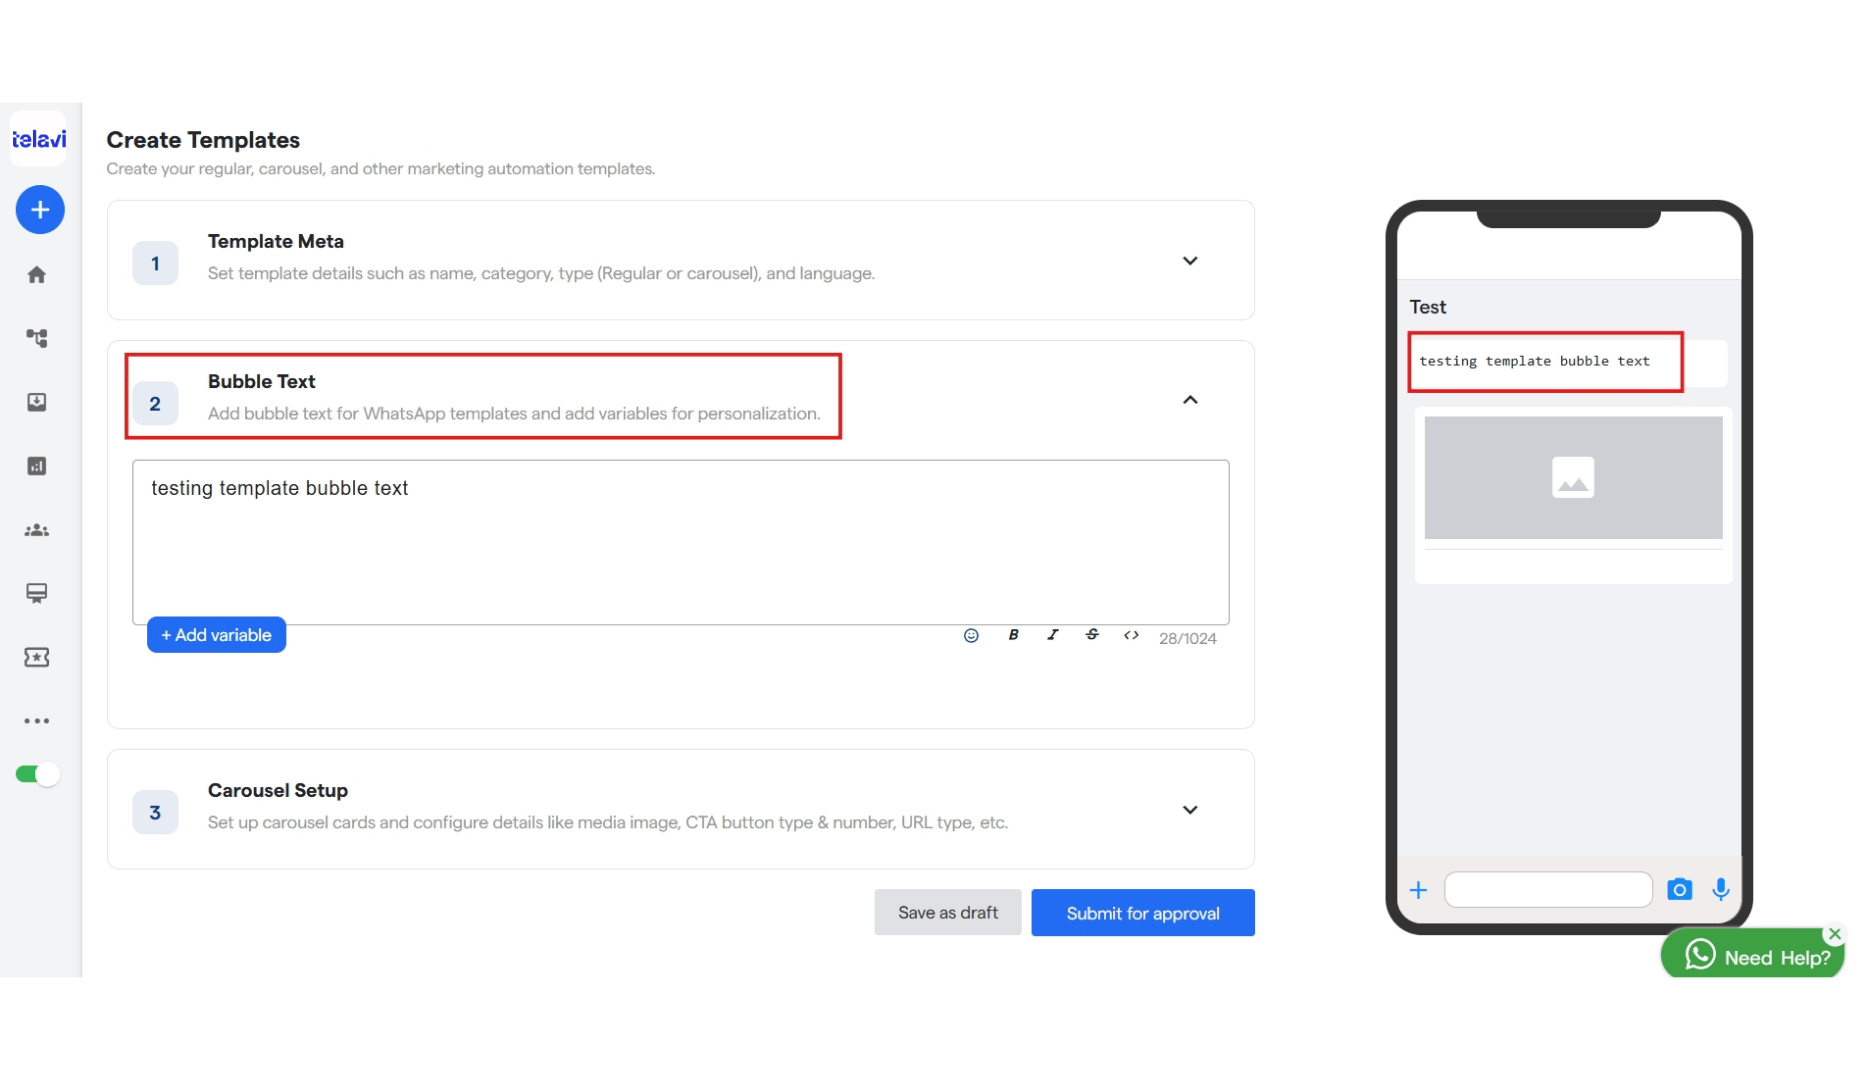
- Bubble Text — Add text for the template and include variables.
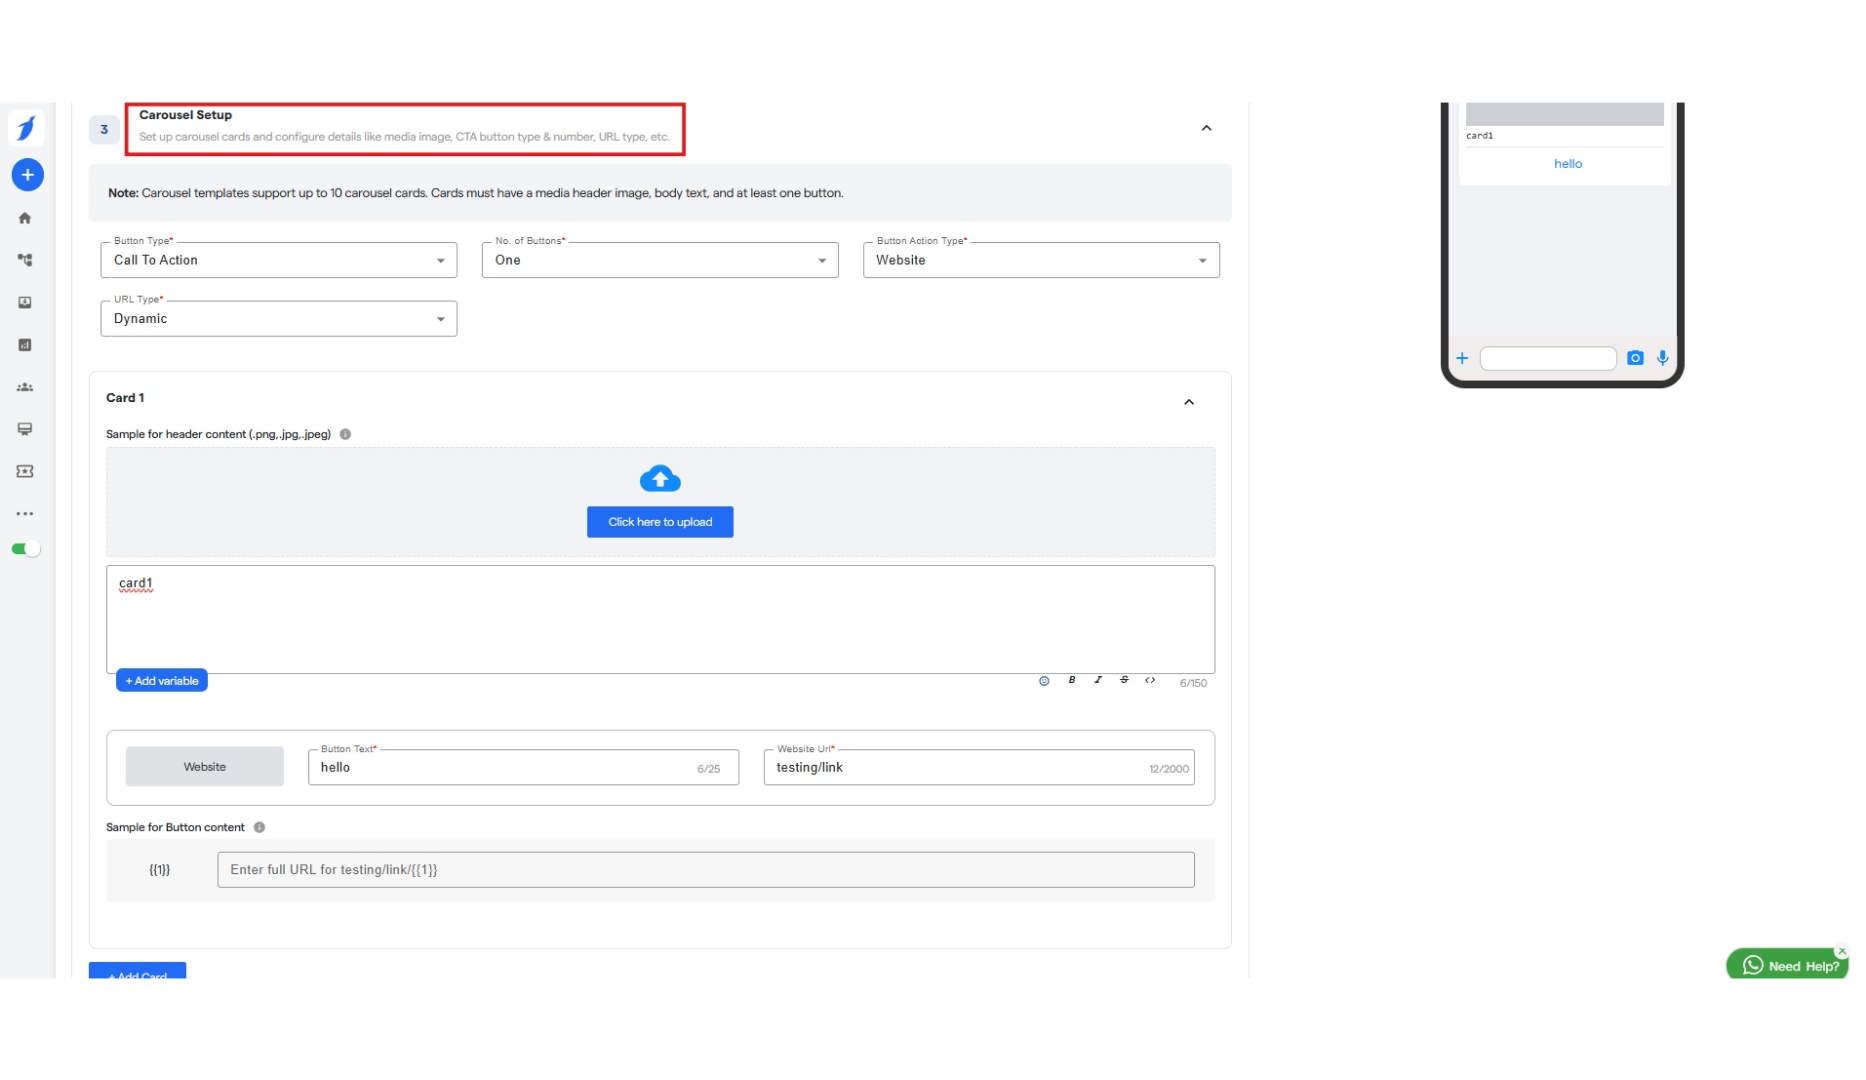
- Carousel Setup — Set up cards, configure their media, and add CTA buttons.
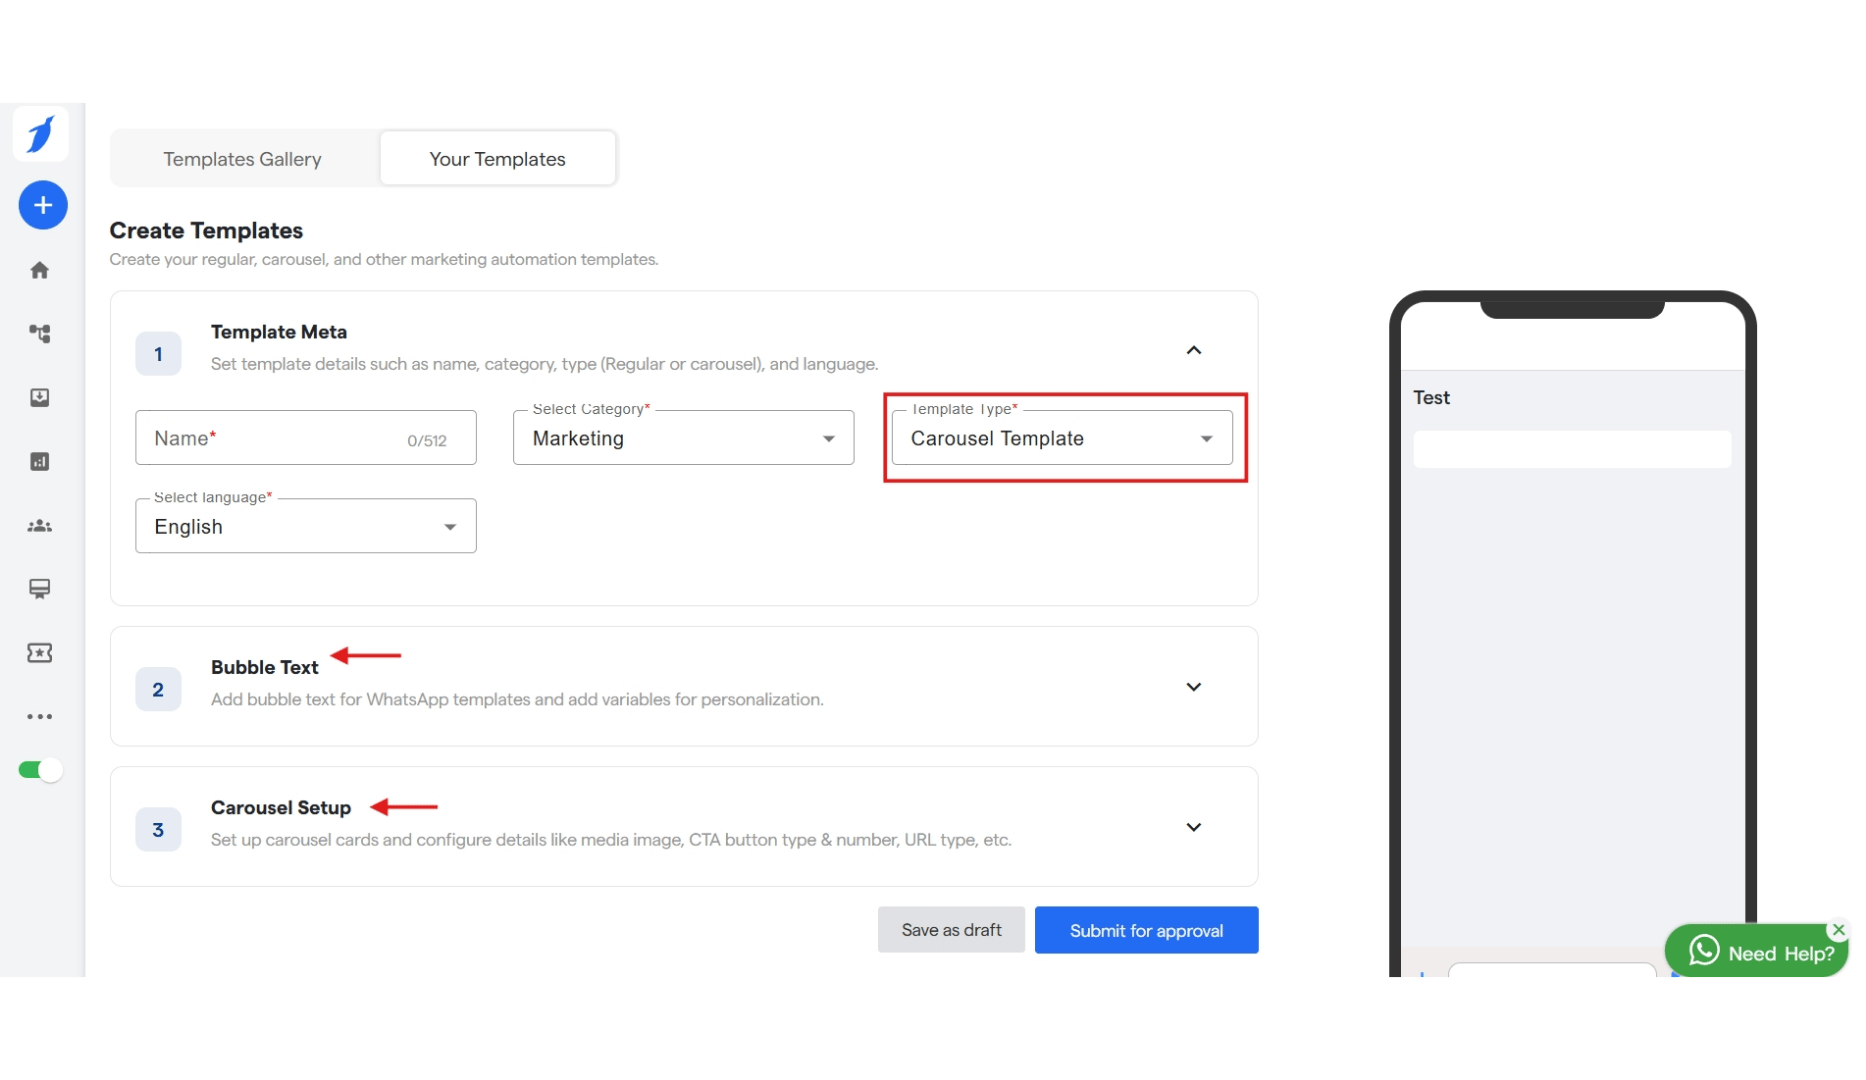
- Inside “Bubble Text”, enter your text and click “Add Variable” to insert a variable.
- Inside “Carousel Setup”, select a button type — either “Call to Action” or “Quick Reply” — and fill in the required details accordingly.
- Create a card for your carousel. Add an image and a description.
- Add a clickable button below the card.
You can add up to 10 cards for your carousel.
- Click “Save as Draft” or “Submit for Approval”.
Done! You have created your WhatsApp Template. Now wait for it to be approved by Meta.