

TelaviOneChatAI AI
TelaviOneChatAI utilizes a combination of ChatGPT, proprietary technology, and specialized training to create custom AI models tailored to your business’s unique knowledge and customer service needs. You can feed data to your custom AI model through various sources, including website URLs, content files, and FAQs. This enables TelaviOneChatAI to develop AI solutions that deliver exceptional service and support to your customers by leveraging both publicly available information and your business-specific data.Setup ChatGPT and AI Settings
Step 1: Create Your Bot- Begin by creating your chatbot. Once completed, proceed to the next step.
- Go to “AI Settings” inside “WhatsApp Chatbot Settings”.
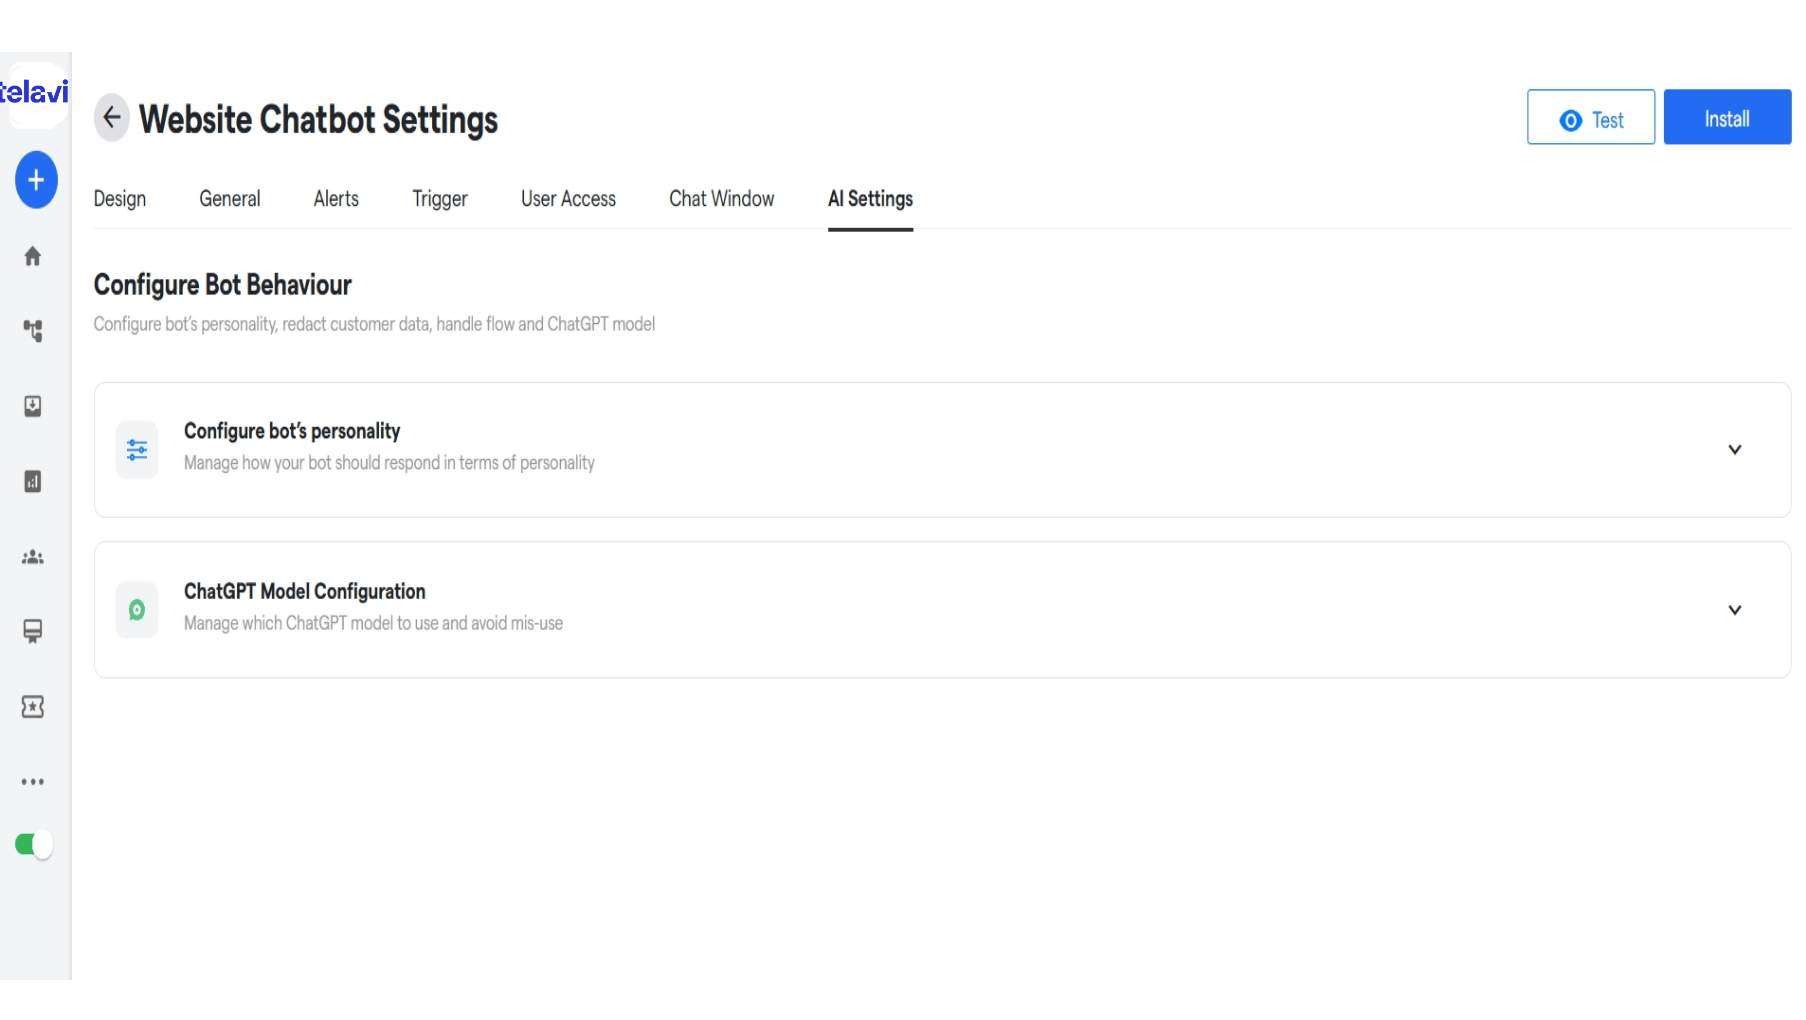
- Click on “Create a Persona”.
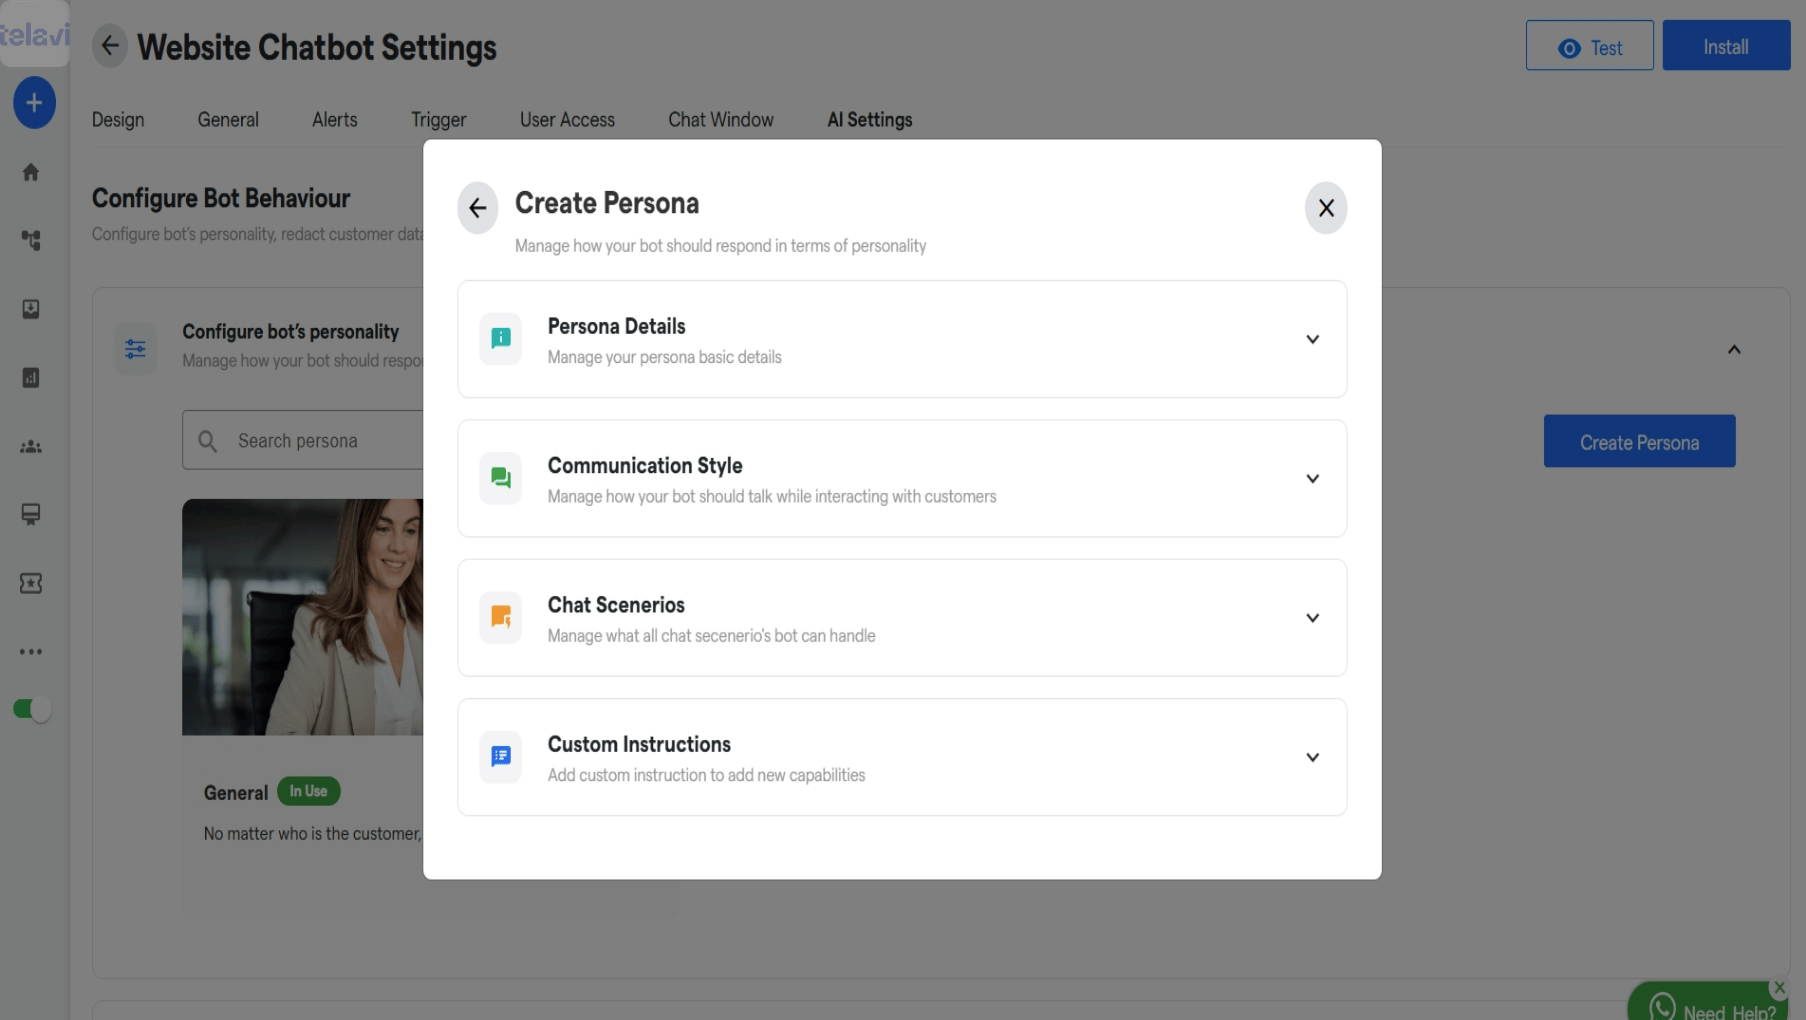
- Bot’s Personality
- Answer Length
- Answer Perspective (1st person, 3rd person, etc.)
- Tone
- Language
- Answer Formatting
- Included Sources for Response
- Custom Prompt Instructions
- Unusual Chat Scenarios
- Message for When Bot Can’t Answer
- Message for Responding to Inappropriate Language
Persona Details
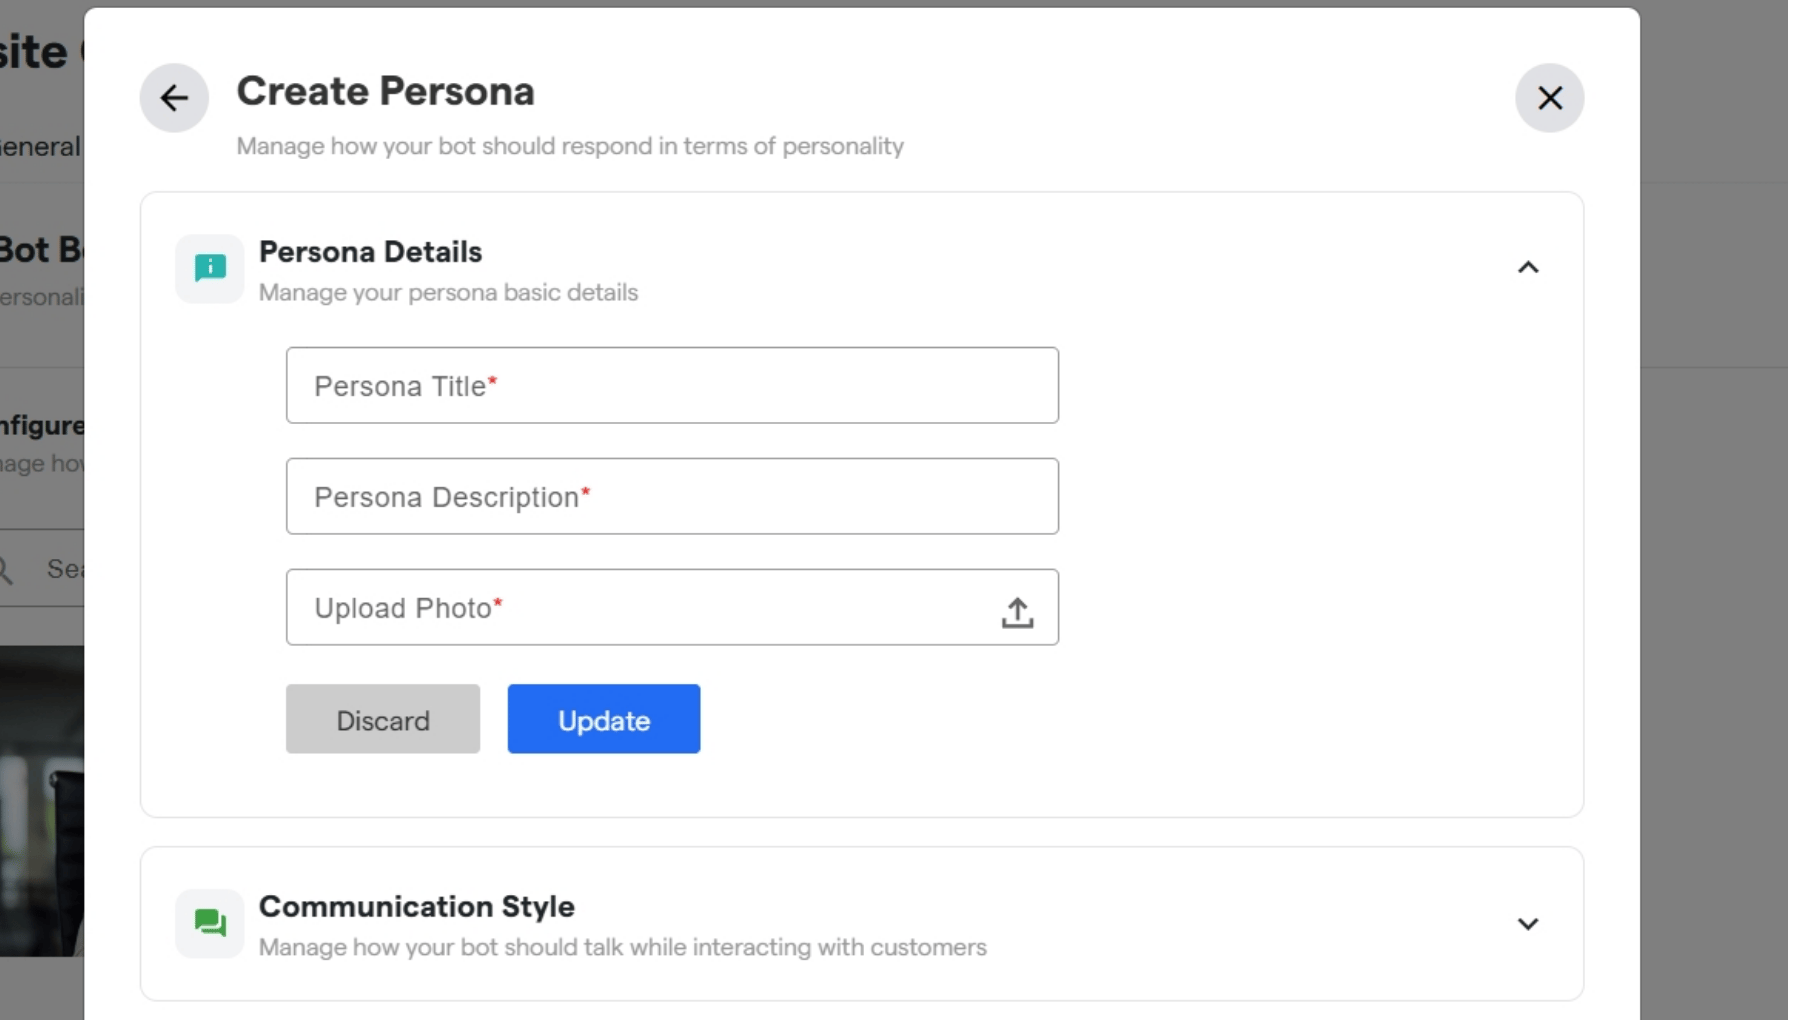
- Enter the persona title, description, and upload a cover photo for your bot’s persona.
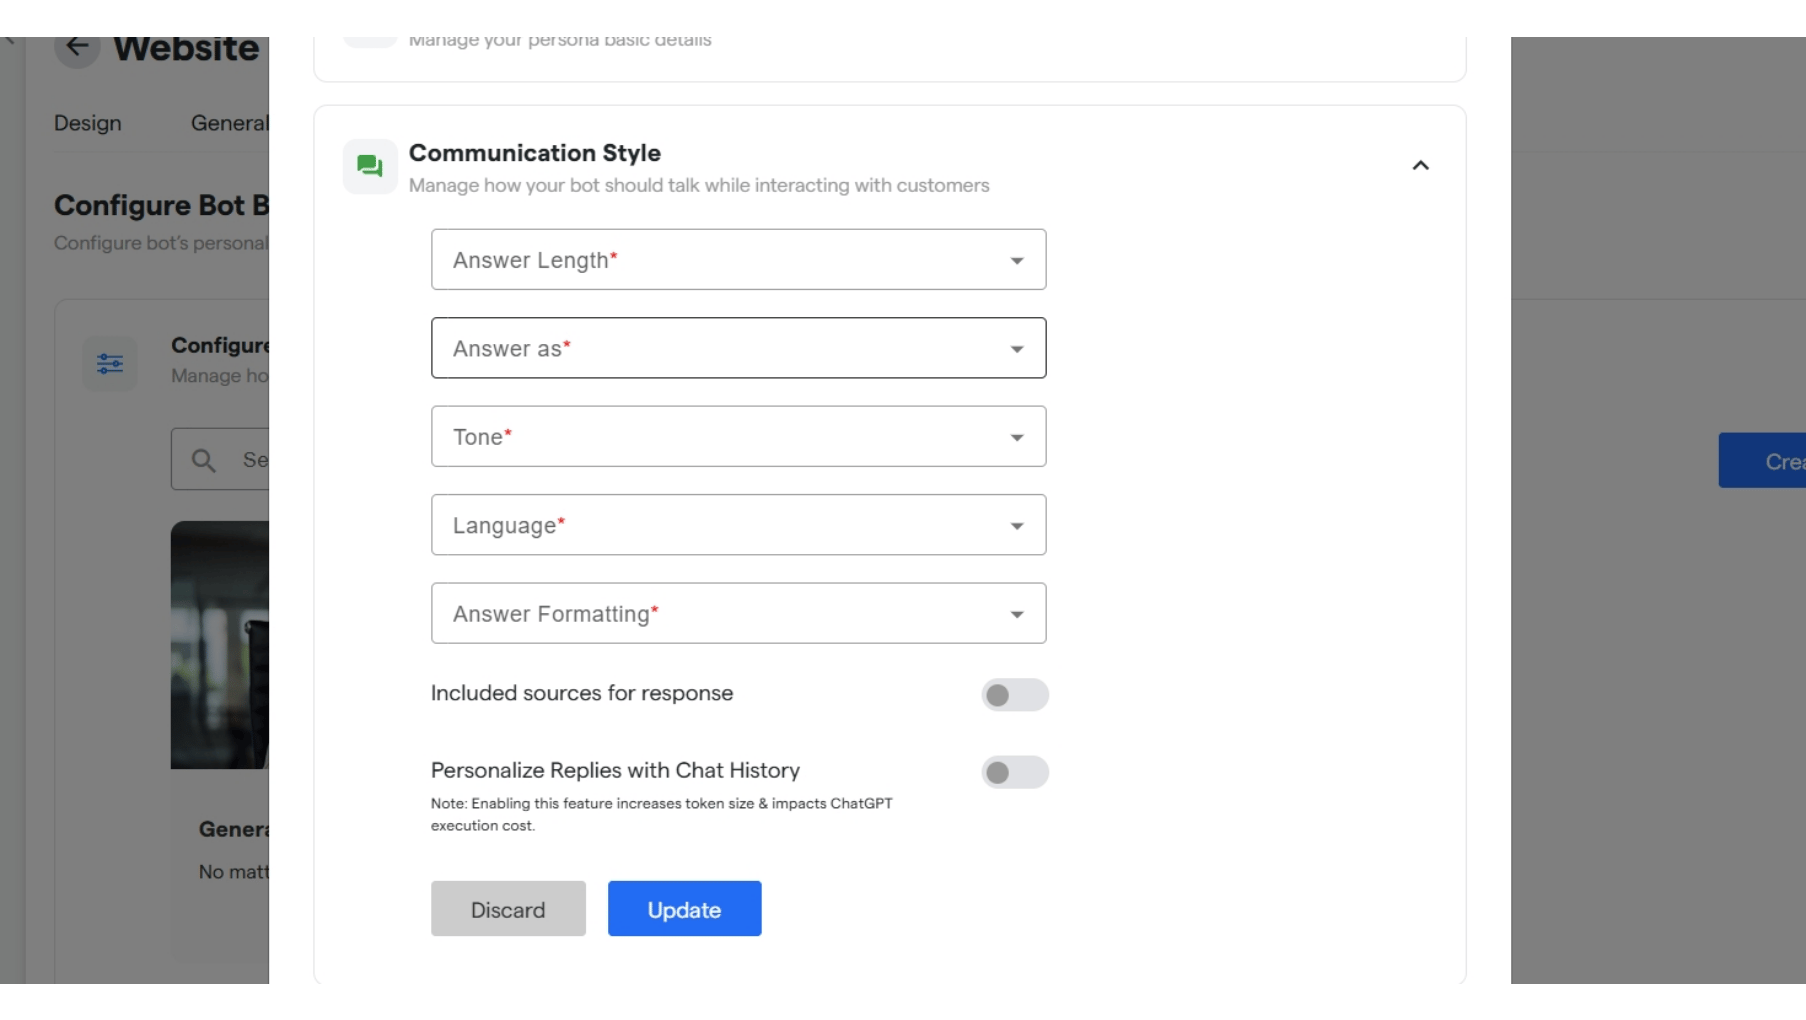
- Under Communication Style, configure answer length, answer perspective, tone, language, and answer formatting.
- You can toggle Sources and Personalize Replies with Chat History on or off.
If “Include Sources for Response” is ON, the bot will share the source name from the knowledge base in its replies.
Chat Scenarios
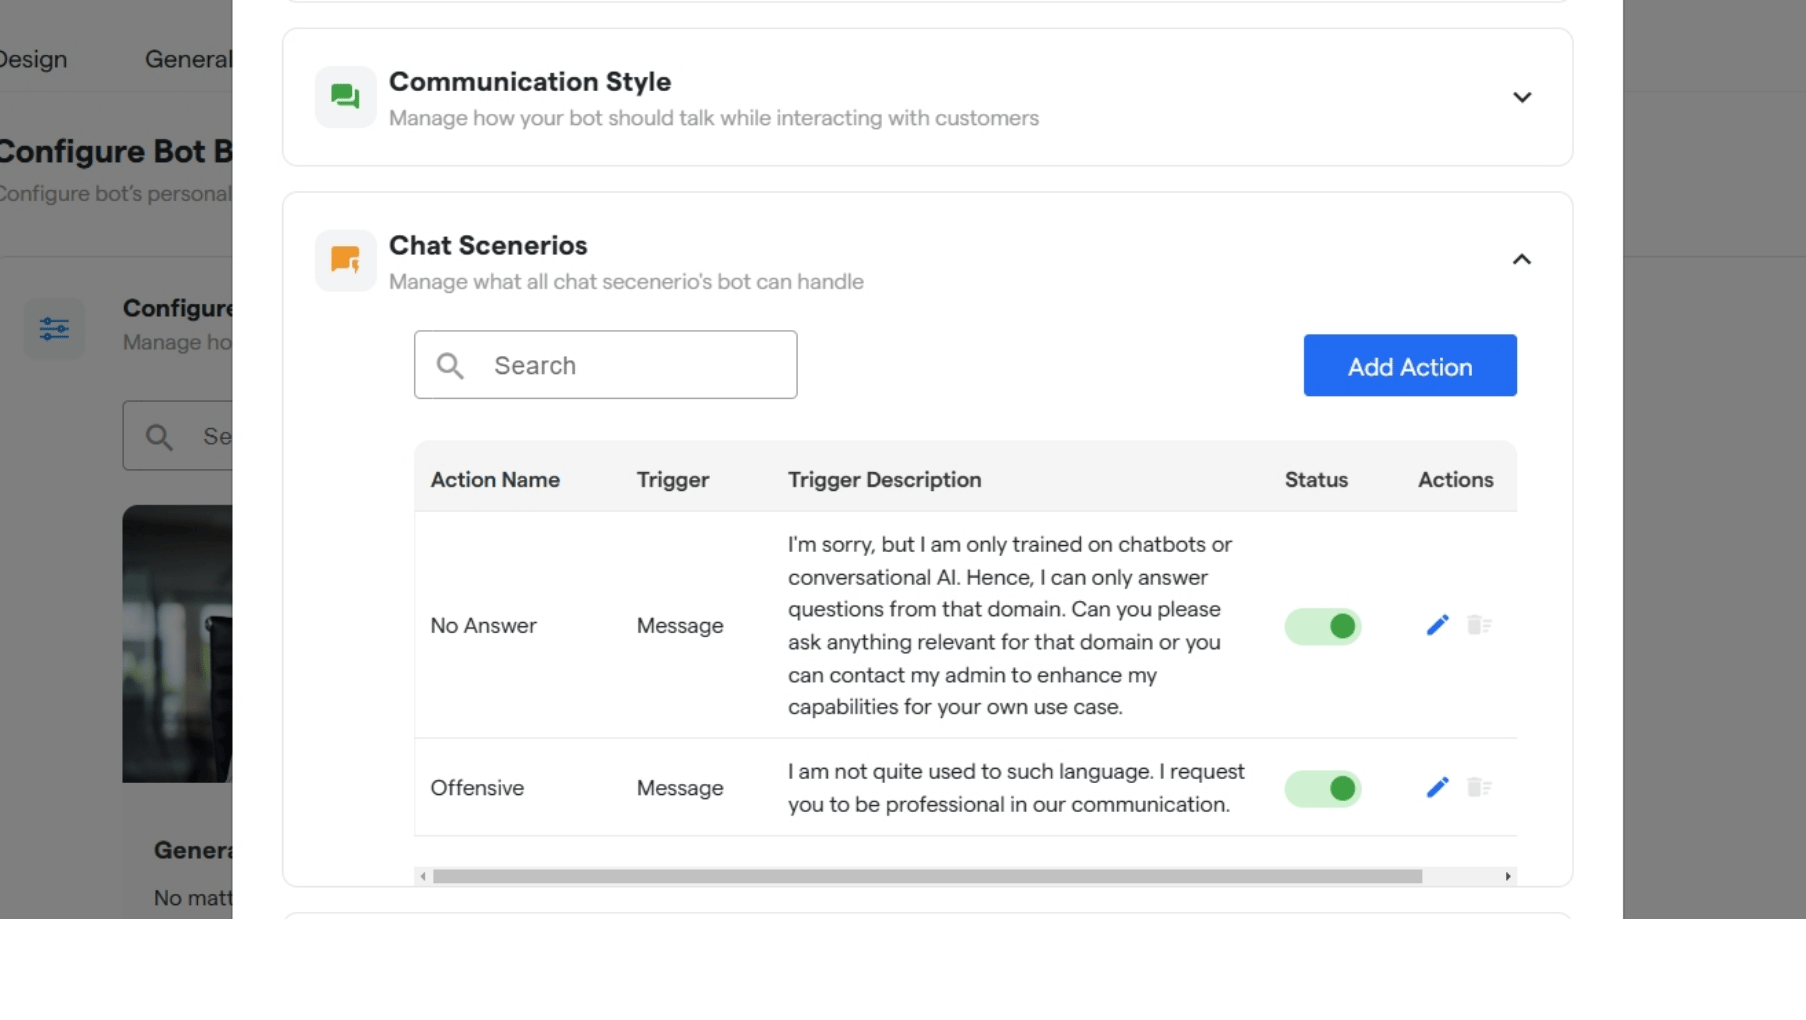
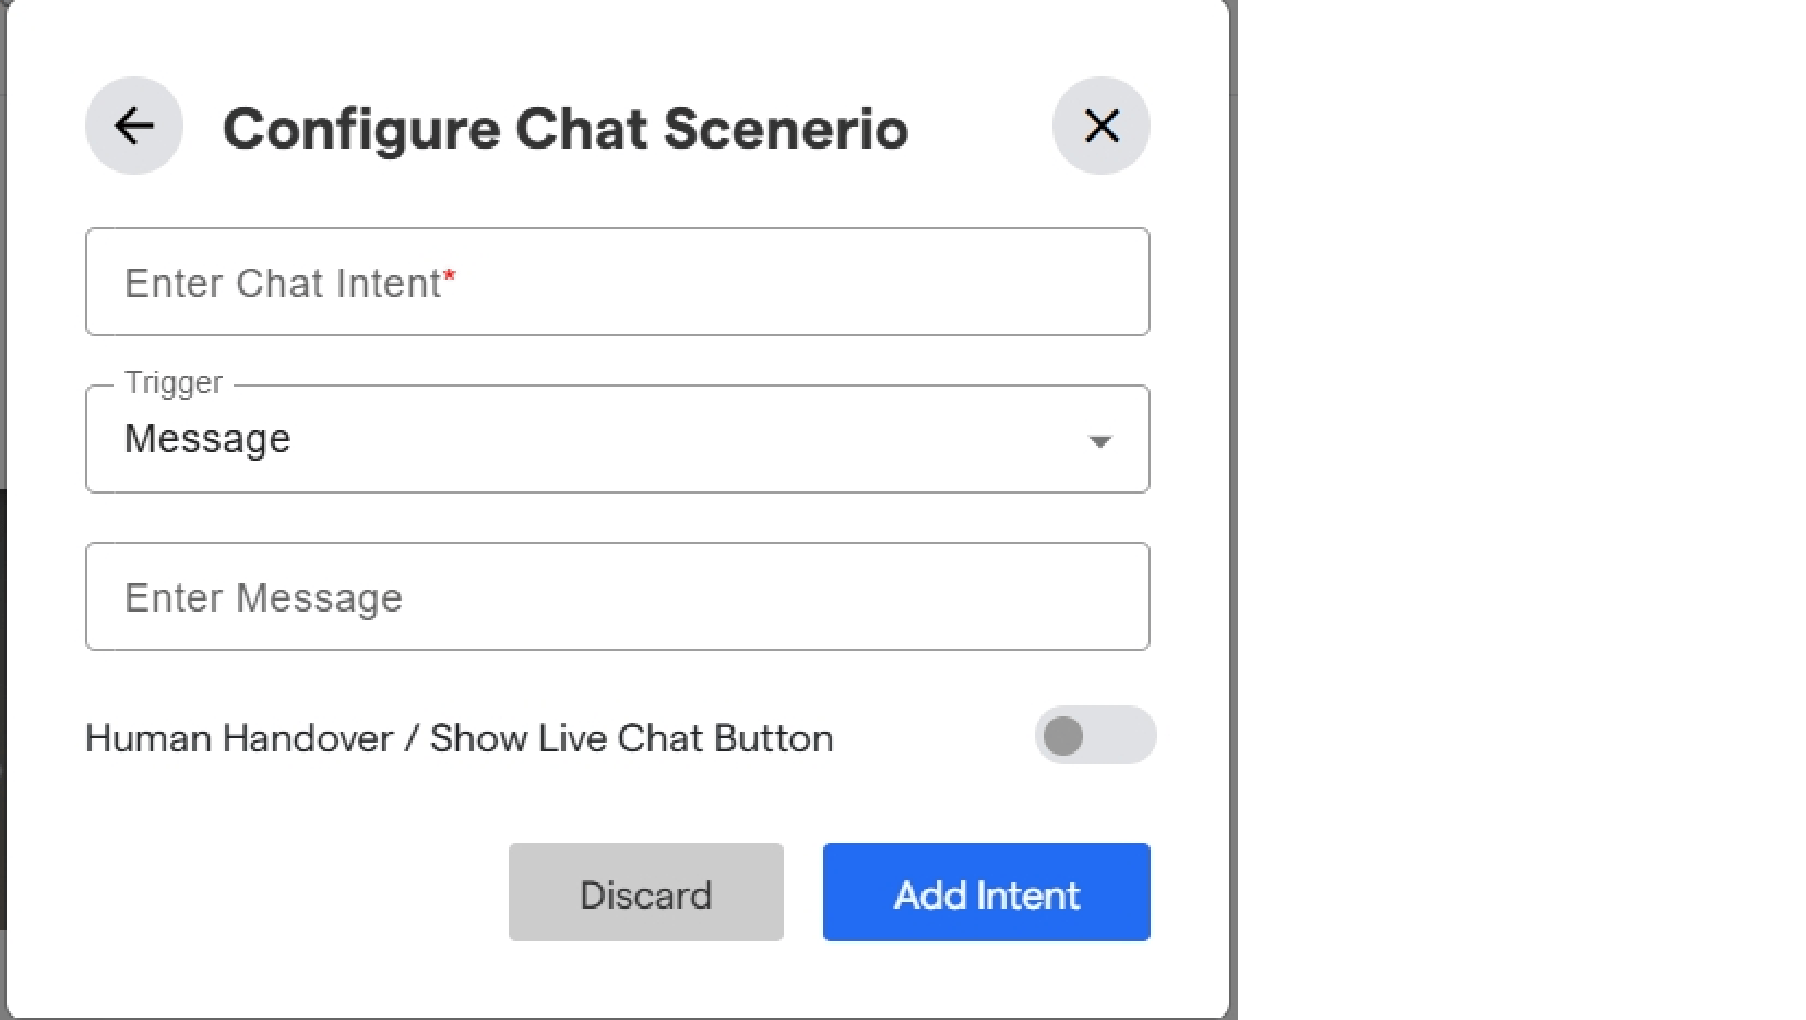
- Click “Add Action” to add a chat scenario.
- Select or add an action that gets triggered based on the user’s response.
- Add a keyword based on which the LLM will identify chat intent and respond with the message or flow set by you.
- Toggle ON/OFF to show a live chat button when the scenario is identified.
- Under Custom Instructions, add a prompt that best defines your bot’s persona. Example: “Act as a salesman, use a formal tone, and be polite and friendly.”
- Click “Update” to save changes.
- Click “Use Persona” to apply it to your chatflow.
Persona in Chatflow
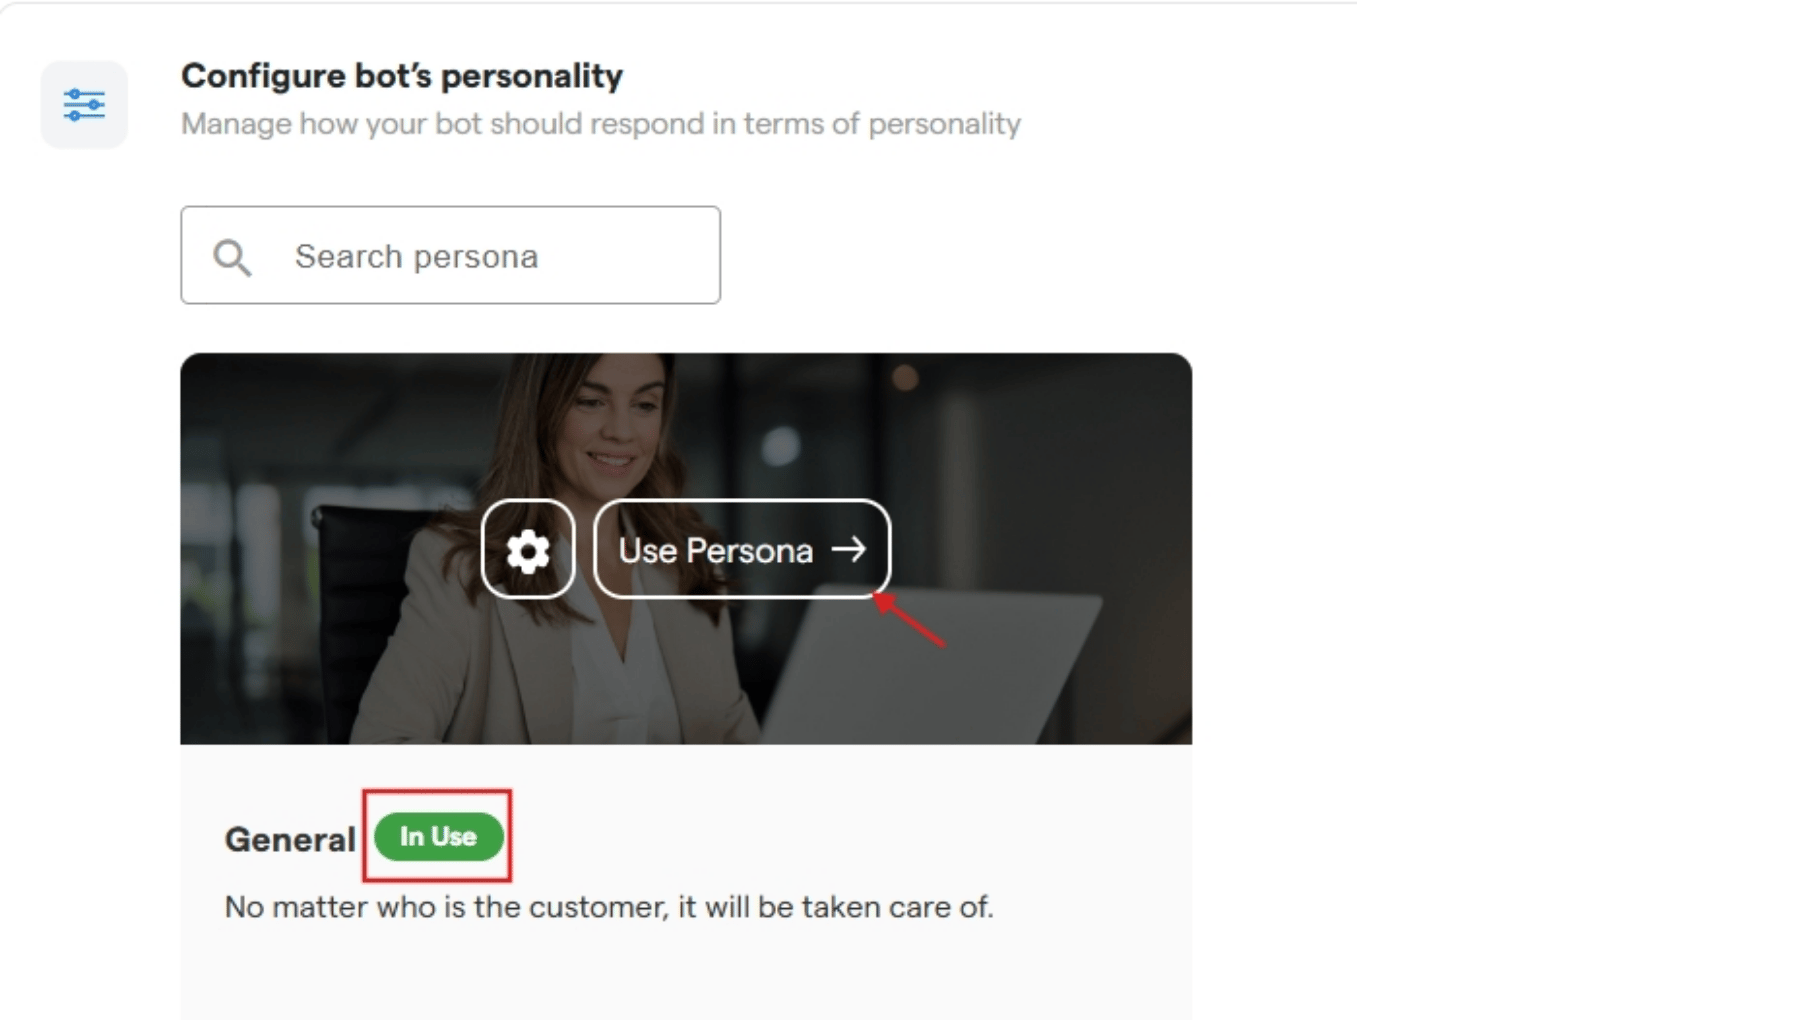
- The AI model in your chatflow will now work based on the persona you have set.
Step 4: Configure ChatGPT Component
- Integrate the ChatGPT model with your bot for better outputs.
- You can invoke the ChatGPT component at multiple points in the chatflow as needed.
- Select the GPT model you want to use after integrating with ChatGPT.
By default, the model is set to GPT-3.5 Turbo.
You’re done! Whenever the ChatGPT component is invoked, your custom-trained model will provide responses based on the settings and training you have configured, enhancing your chatbot’s conversational abilities.